Parking Lot Lighting Upgrade
What Is a Parking Lot & Area Lighting Application?
Parking lot and area lighting refers to exterior lighting systems commonly mounted on poles to illuminate:
- Parking lots and vehicle lanes
- Walkways and pedestrian paths
- Drive aisles and loading zones
- Campus roadways and perimeter areas
Most parking lot systems use pole-mounted fixtures, often with one or more fixtures per pole depending on the site layout, pole height, and coverage requirements. The right design balances visibility, uniformity, glare control, and spill-light management—especially near property lines and neighboring sites.


Most existing parking and area lighting applications utilize high intensity discharge (HID) lamps such as metal halide, high pressure sodium, and - if they are very old - mercury vapor lamps.
Here are some comparison blogs you can read to learn about the differences in these types of lamps:
- Lighting Comparison: LED versus HID Lights
- Lighting Comparison: LED vs Metal Halide Lights
- Lighting Comparison: LED vs High Pressure Sodium (HPS) and Low Pressure Sodium (LPS)
Common Issues With Traditional Parking Lot Lighting
Many existing parking lots still rely on HID lamps (metal halide, high-pressure sodium, and older mercury vapor). These systems tend to create three recurring problems for facility managers and property operators:
Energy Costs That Add Up Across the Lot
Traditional fixtures often run at higher wattages, and exterior lights frequently operate dusk-to-dawn. When you multiply per-fixture energy draw across dozens of poles, the annual electrical spend becomes a major line item—especially for multi-site operators.
Maintenance Costs From Lift Equipment and Labor
Pole-mounted fixtures are expensive to service. Even “simple” repairs can require:
- lift/bucket truck rental
- traffic control or lot closures
- contractor scheduling
- replacement lamps/ballasts/ignitors
Over time, the labor and equipment costs often outweigh the price of the lamp itself—making maintenance one of the most frustrating parts of HID ownership.
Lighting Performance Problems: Hot Spots, Dark Areas, and Poor Color
HID systems commonly create:
- bright “hot spots” under poles
- darker zones between poles
- degrading output over time (especially metal halide)
- low visibility and poor camera clarity (especially high-pressure sodium’s orange light)
When light levels and uniformity drop, it can affect safety perception, security footage quality, and overall curb appeal.
Our Service Offerings
Benefits of LED Parking Lot Lighting Upgrades
LED parking lot lighting is popular because it improves both how light is generated and how it is distributed.
LED fixtures use multi-point diode arrays with dedicated optics that can be tailored to your layout—often producing more consistent coverage than legacy reflector-based HID systems.
1) Energy Savings
LED parking lot fixtures typically use substantially less wattage than HID while maintaining—or improving—target light levels. In many upgrades, facilities see meaningful reductions in energy use, especially when the project includes controls like dimming or scheduling.
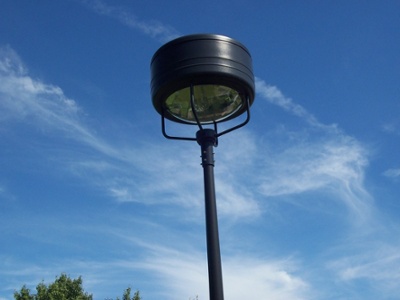
2) Maintenance Cost Reduction
LED fixtures are designed for long service life, reducing re-lamping frequency and minimizing lift-related service calls. For sites with many poles or hard-to-access areas, this creates more predictable budgeting and fewer disruptions.
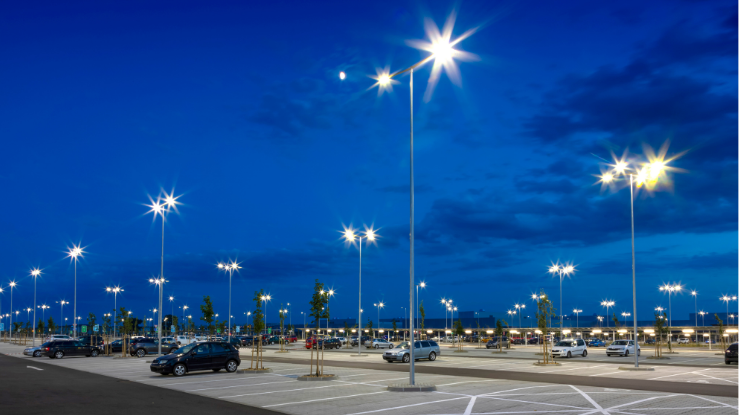
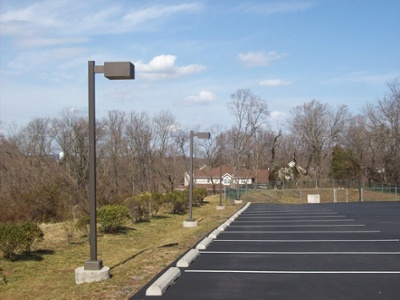
3) Improved Lighting Performance and Visibility
LED upgrades can deliver: more uniform light distribution across the lot, better color rendering for visibility and wayfinding, improved camera performance for security systems, reduced glare when specified correctly, better spill-light control via optics/shields when needed
What a Parking Lot Lighting Upgrade Changes


How to Plan a Parking Lot Lighting Upgrade
Step 1: Work With a Manufacturer-Neutral Partner
Parking lot lighting isn’t a commodity. Pole height, spacing, mounting arm type, distribution pattern, and local conditions all influence outcomes. A manufacturer-neutral partner (like Stouch Lighting) helps you match the right product and optics to your site—rather than forcing a one-size-fits-all fixture.
Step 2: Define Project Goals
A good plan starts with your priorities:
- reduce kWh and operating costs
- improve uniformity and safety perception
- enhance security camera visibility
- minimize maintenance and service calls
- limit glare and spill light near neighbors
- standardize fixtures across multiple locations
Step 3: Confirm Layout + Performance Requirements
We help evaluate:
- existing pole locations and heights
- fixture mounting orientation
- distribution type and aiming strategy
- control options (photocell, motion dimming, scheduling)
- any special requirements (dark-sky considerations, coastal environments, high-wind, vandal resistance)
Step 4: Implement With Predictable Scope and Support
For many organizations, the win is a repeatable approach: standardized fixture families, consistent CCT, consistent controls, and a plan that scales across a portfolio.

